Hello, my friends. Over the years, the C-Cubed has seen its fair share of movie properties expanding itself into the world of comics. From RoboCop, Die Hard and Bill & Ted to Shaun Of The Dead & Galaxy Quest, the realms of cinema has had a long-and-winding relationship within these four-walled panels. Keeping with the spirit of celebrating the anniversaries of particular media franchises, it’s time that we delve into the past and unmask a certain batch of tie-in materials that won’t fall apart after only 99 minutes. As such, I welcome you to a special article called…

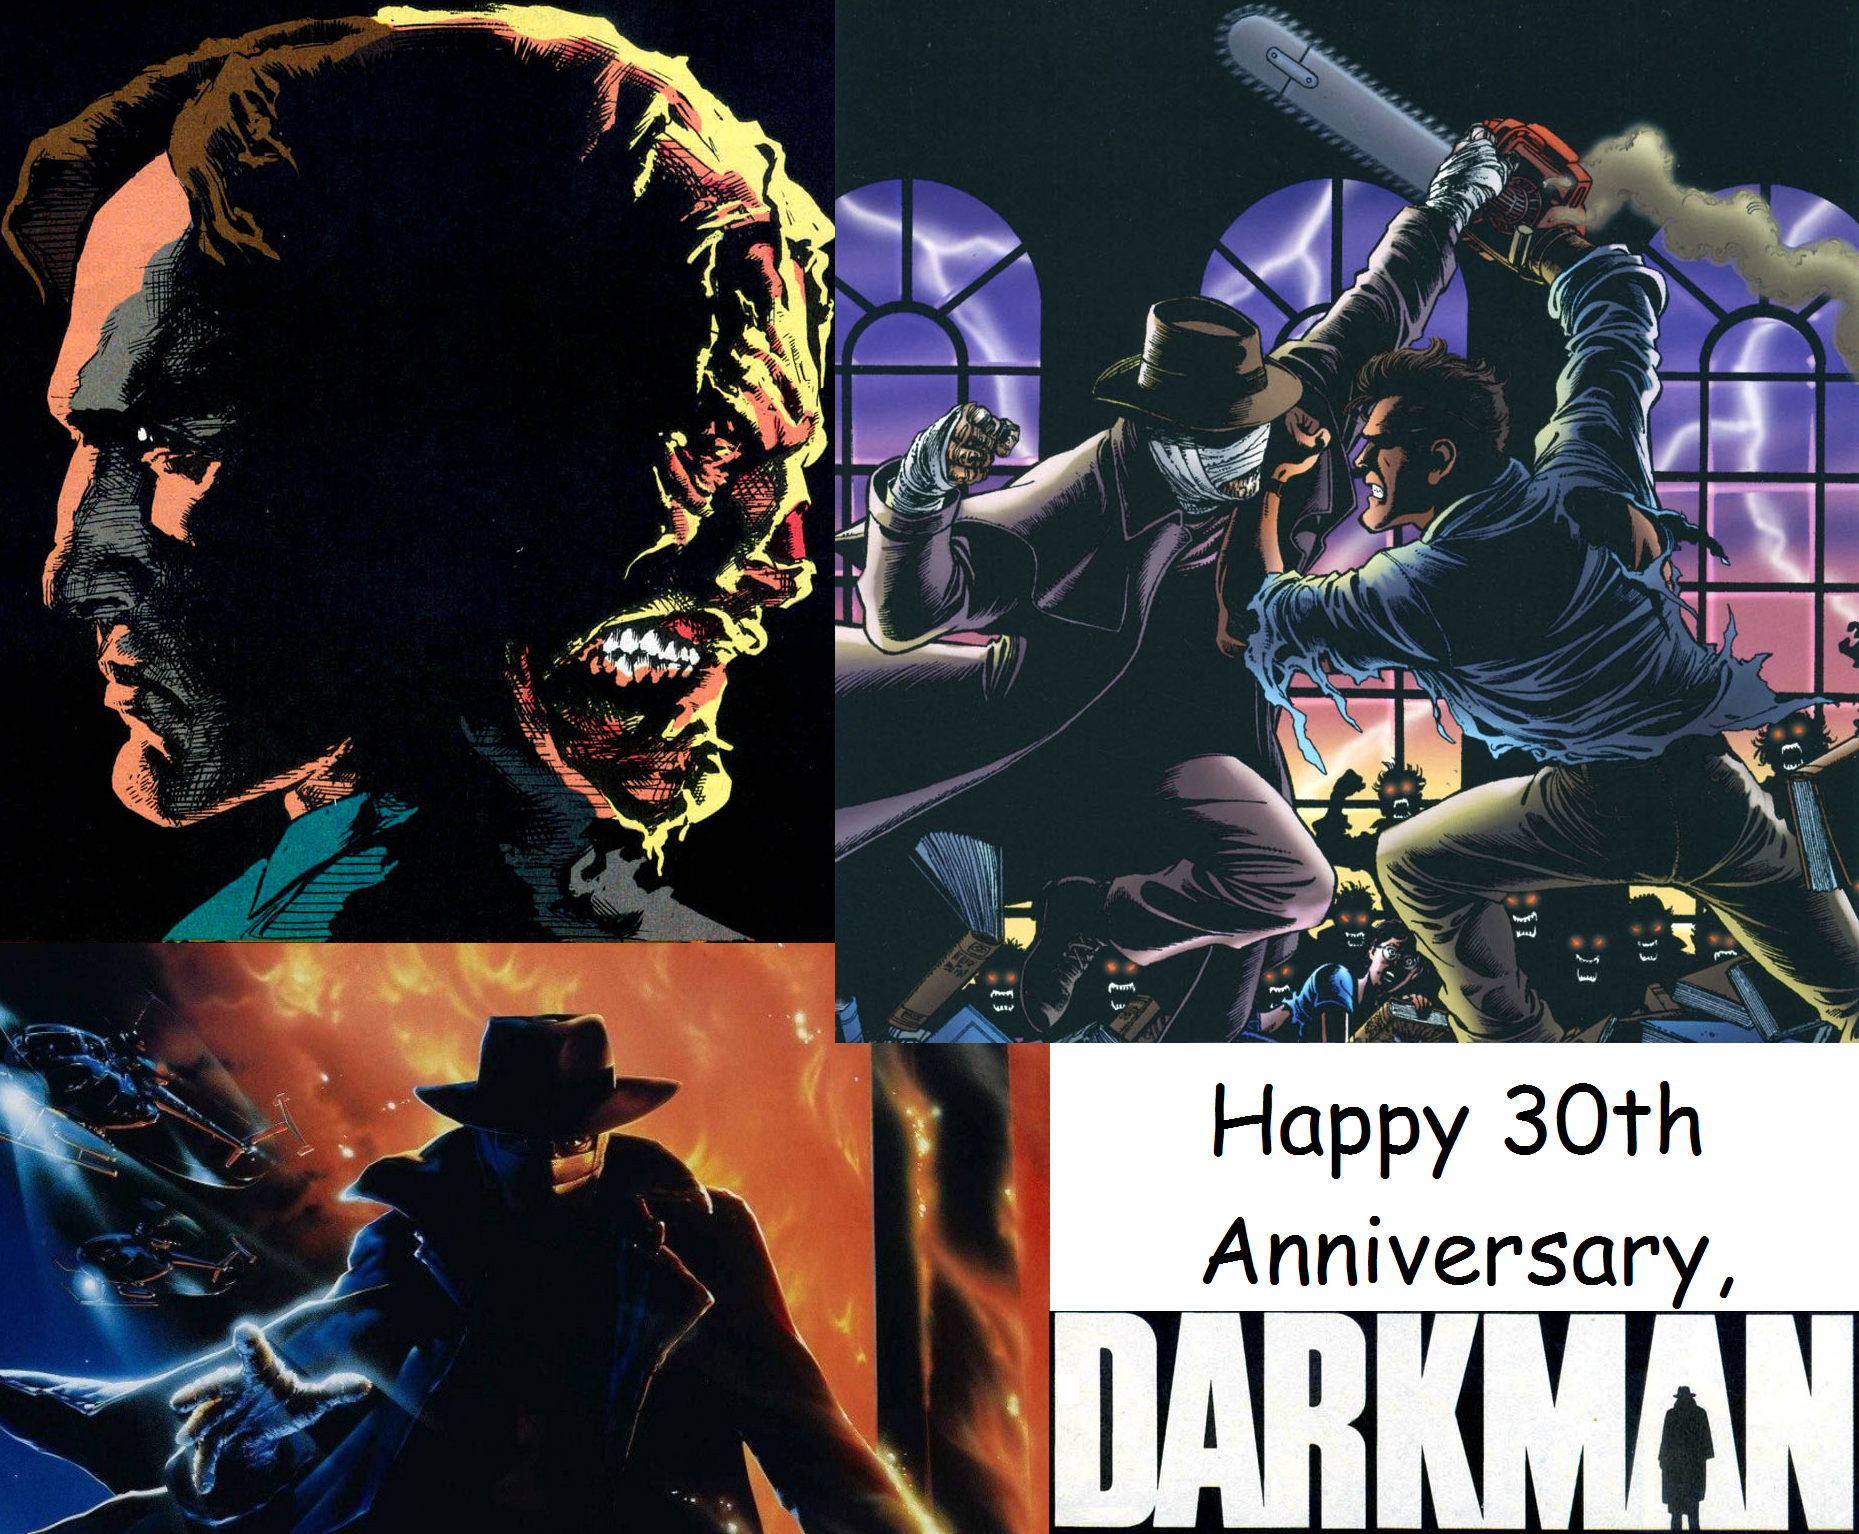
Created by famed director Sam Raimi, the character came about when he was unable to gain interest from major studios in helming a superhero flick on either Batman or The Shadow. After all, he had only four films (1977’s “It’s Murder”, 1985’s “Crimewave” & the first two Evil Dead movies) and a 1978 short (“Within The Woods”) under his belt. As such, he formed his original character within a short story called “The Darkman”. In creating said being, he was influenced from Universal Pictures’ classic horror flicks, especially “The Phantom of the Opera”. After turning his 30-page short story into a 40-page treatment, he submitted it to Universal in 1987 and was approved to make it into a movie.

With the help of a creative marketing campaign that convinced its intended audience to find out “Who Is Darkman?”, the film ultimately saw its theatrical release on August 24, 1990, where it received positive reviews and went on to gross over $48.8 million against its $16 million budget. With Sam having written the story and co-writing the screenplay alongside his brother Ivan Raimi, Chuck Pfarrer and Daniel & Joshua Goldin, the movie depicted a scientist named Dr. Peyton Westlake (played by Liam Neeson) who’s working on creating synthetic skin for burn victims. Unfortunately, it becomes unstable after being exposed to the light for 99 minutes. Meanwhile, his girlfriend Julie Hastings (played by Frances McDormand) has come across a document called the “Bellasarious Memorandum”, which would expose real estate tycoon Louis Strack, Jr. (played by Colin Friels) and his bribing tactics towards Los Angeles’ zoning officials in order to get his city built. Shortly after Peyton and his assistant Yakitito discover that the synthetic skin remains stable in the dark, they’re approached by crime boss Robert G. Durant (played by the late Larry Drake) and his goons who’re also looking for said document. They proceed to kill Yakitito before roughing up Peyton and finding the memorandum. Afterwards, they rig the lab to explode where Dr. Westlake is caught in the middle of the blast and is flung out to a nearby river. Having survived the ordeal, he gets discovered by some fishermen and winds up in a hospital where they save him with a procedure that cuts off his ability to feel any physical sensation, thus compensating him with enhanced adrenaline flow, though it does affect his mental facilities. Using his newfound strength to escape, he gathers his synthetic skin-making equipment, hides out in an abandoned factory and prepares to get his revenge upon those who’ve wronged him.


To coincide with the movie’s release, Marvel would begin publishing a three-issue adaptation from August to September 1990 (if we go by the October-December 1990 publication dates). Written by Ralph Macchio and drawn by Bob Hall, Mark Texeira would ink the first issue while Jonah Hex co-creator Tony DeZuniga took over those reigns for the last two issues. There was even a black-and-white magazine printing in September 1990 that combined all three issues. As for how this translates the movie’s narrative, here’s the differences that I was able to come across.


Kicking things off here is the pre-title scene where Durant and his cronies arrive to force mob boss Eddie Black out of his Los Angeles-based waterfront territory. Despite getting frisked beforehand and having been stripped of their initial weapons, Durant and company had a surprise up their sleeves as fellow henchman Skip has a prosthetic leg that doubled as a hidden machine gun. A shootout ensues (with the movie having some of Black’s men even driving around the warehouse as well) before Eddie’s men are defeated and he’s captured before getting his fingers cut off by Durant and his cigar-cutter.


Moving on, we have the scene where Dr. Westlake and Yakitito have created a synthetic nose, only for the skin to fall apart after 99 minutes. Even though they’re baffled as to why it keeps destabilizing, Peyton’s willing to keep on cracking this code. Unlike the film, this scene has more dialogue, mainly to detail the process to the reader in several panels. There’s also some added dialogue where Yakitito thinks that he stinks as a scientist due to this constantly failed experiment, to which Westlake tells him to be patient.


Now, we have a deleted scene where Louis Strack, Sr. is out with his son Louis Strack, Jr. as he tells his kin that their company, Strack Industries, shall remain in the real estate business. At a gas station, their limo driver is taking care of a flat tire. Just as the father gets out to head inside and use the restroom, an assailant strolls up and guns him down as the son mourns his dad’s death.

Moving on, we get introduced to Peyton’s girlfriend, Julie Hastings. The adaptation adds a brief moment where she arrives at Westlake’s lab to meet up with her boyfriend, to which he surprises her with a necklace. From there, they watch a slideshow containing their past photos (thus revealing that they’ve been a budding couple for a while) as he tells her that he still hasn’t cracked the 99-minute code. The comic feels the need to mention how this may result in a non-renewal of his grant, while the movie has her exclaiming her belief in him one day perfecting the synthetic skin. From there, they proceed to sleep together.

As we shift to the next day, she has her phone conversation with fellow lawyer Herb Gorson about the Bellisarious Memorandum that she accidentally stumbled across and that she’ll visit Strack Industries to implore about it. As she heads out, Peyton says that they should get married. However, Julie is unsure due to her career and says that she needs some time to think it over before she heads out in a taxi cab.


Over at Strack Industries, there’s initially some added dialogue in the comic where Louis is given sympathy for his dad’s recent death, with Julie even mentioning that her lawfirm represented his father in the past before asking him about the Bellasarious memo that she came across, which contained the information of shady and bribe-filled payments towards zoning commissions. He then reveals a model of a refurbished riverfront that he’s planning, which could require “the occasional distasteful chore” in order to accomplish his dream goal. After she exclaims that she doesn’t have the memo with her right now, he brings up Durant who’s fighting for control of the waterfront and will attempt to reclaim said document. The comic does add some dialogue, but nothing of noteworthy change towards the scene.


We then shift over to Westlake’s lab where he and Yakitito are performing another stabilization run on another batch of synthetic skin. Early on, there’s a few differences in terms of dialogue. In the movie, Yakitito mentions how the DNA content, glucose and the collagen readings are perfectly normal for the synthetic skin, despite its constant failures. With the adaptation, he instead asks Peyton about his proposal. How the lights go out is also a minor difference, since the film has a blown circuit while the comic has it as a blown-out bulb. Either way, they discover that the synthetic skin cells are staying stable past 99 minutes, but only in the dark. One last difference involves Julie and her arrival to her boyfriend’s lab. The movie simply has her arriving with the implication that she’s going to accept his marriage proposal. In the adaptation, she tries to call him from her office (maybe to say that she’ll marry him). Either way, Peyton is about to answer the phone, but his hand gets grabbed as Durant and his cronies arrive. Westlake gets roughed up as Robert calmly asks him for the Bellasarious Memorandum, while Yakitito gets suffocated with plastic wrap on his face. However, the comic leaves out the detail of Westlake exclaiming that he doesn’t know what they’re talking about. Ultimately, Ricky Anderson (played by Ted Raimi) executes Yakitito before Rudy Guzman (played by Rafael H. Robledo) finds the key memo. From there, Robert’s men proceed to rough up Peyton even more. While the movie shows his hands getting scarred via electrocution, the comic sees his face getting tarnished by getting shoved into vials of chemicals. Either way, Westlake gets his face dumped into a chemical tub, while Durant preps the lab’s eventual explosion by unleashing a tank of acetylene and placing a lighter underneath a drinking bird. Just as he and his men leave, Julie arrives outside of the lab. Inside, the injured Westlake tries to prevent the drinking bird from setting off the explosion, but he’s unable to reach it in time as it hits the lighter, sparks the gas and blows up the building to Julie’s horror. Unbeknownst to her, Peyton gets flung towards the nearby river.


From there, it transitions over to Westlake’s funeral. Just like before, the cryptkeeper mentions that a lone ear was the only thing recovered from the blast. He does have some added dialogue in the comic, but it’s nothing too vital. While Julie does fall to her knees in shock, the adaptation has her exclaiming that if things went differently, then they would be together in united bliss. Either way, the pastor helps her up and walks with her away from the grave.


Now, we move on to Peyton having been recovered and in the hospital. Because of the excessive burns on his body, he was unable to be identified due to the staff not finding any I.D. on him and thus, he gets classified as a John Doe. As the Burn Doctor (played by Jenny Agutter of “An American Werewolf In London” fame) explains to her fellow medical staff (which includes cameos from John Landis & Ivan Raimi), he’s been given the Rangeveritz Technique, severing his brain from feeling any physical pain. However, it’ll amplify his emotions (especially “uncontrolled rage”) due to an increased flow of adrenaline. After waking up, he uses his enhanced strength to rip out of his restraints and escape.


After finding a massive trenchcoat in a dumpster and putting it on, he sees Julie within the rain and tries to approach her. However, she mistakes him for a random stranger and runs inside a nearby building as he’s forced to wander off into an alley.


Eventually, Westlake reaches the burnt out remains of his lab. After finding a mirror, he tears off some of the bandaged wrappings around his face and is horrified by what’s been done to him. The adaptation adds onto this scene to close out the first issue as he gets angry towards Robert and his men for ruining his life. As such, he vows to get revenge on his thuggish abusers, to the point where he gives himself the moniker of Darkman.


Issue 2 begins with a change of sequence from the film as Peyton begins his vengeance quest by discovering Rick’s discarded prescription case within his burnt out laboratory. From there, Westlake arrives at Anderson’s apartment and attacks him in his bedroom. In the movie, Rick was attending a “City of the Future” ball with Durant and was walking home before Darkman kidnaps him. Either way, he interrogates Rick before permanently removing him from the present situation. Afterwards, he briefly sneaks into Julie’s apartment and tearfully observes her for a bit before taking his leave just before she wakes up.


Moving on, we have Peyton taking the remains of his still-functioning machines and establishing his base in an abandoned factory. After setting up his equipment, he begins to configure a mask designed from his original face. While the film had him inserting a partially-damaged picture of himself that was missing potions of his right-half facial features, he was able to overcome this minor obstacle and recreate his old look. In the adaptation, the picture was still in tact and thus, the machine had no problem replicating his face. Either way, he has the equipment begin the facial reconstruction. In the film, the process is set to become complete in 571 hours & 57 minutes (just over three weeks), while the comic has it at 71 hours and 57 minutes (slightly less than three days). From there, he takes the time to perfect the synthetic skin. While the adaptation has a caption on how “the hours pass, as this tormented, driven soul toils in silence”, the movie has a brief montage where Peyton is still unable to keep the skin stable past 99 minutes. Either way, he discovers that his hand (right in the comic, left in the film) had caught fire after being too close to the bunsen burner, where he mourns over the fact that he couldn’t feel anything there due to recent events.


After the movie has Darkman kidnapping and interrogating Rick (where he learns about his boss’ name and about an upcoming payment pick-up) before axing the cohort off (which was done by propping him up through a man hole until a truck ran over the goon), we have the scene where Peyton takes Pauly’s picture from afar as he’s given a money-filled briefcase by his fellow cohorts. With the thug’s face, hand and body make-up captured, he’s able to recreate himself into Pauly’s image before sneaking into the goon’s apartment and subduing him with chloroform. From there, Darkman places a packed suitcase with plane tickets there before disguising himself as Pauly in order to retrieve another money pick-up from his cohorts, specifically Rudy and Skip (though Skip here isn’t entirely as he looked in the first issue). Ultimately, they express their concern over the fact that Rick is missing before giving Peyton-as-Pauly another cash-filled briefcase. Later, Robert and Rudy approach the actual Pauly in his apartment, demanding to know where the money went. The goon truthfully says that he overslept and missed the pick-up, but then the briefcase and plane tickets are immediately found as Durant instantly buys this as the explanation for Rick’s disappearance. Pauly tries to explain that he was in his apartment all along, but Robert doesn’t buy it as he throws his former cohort out the window to his death. While Pauly lands on a car in the movie, he smacks onto the sidewalk in the comic. Either way, Darkman-as-Pauly sees this end result before he’s forced to flee due to his disguise beginning to disintegrate in its final minute of stabilization. Afterwards, there’s an added difference that happens. While the movie has him briefly brooding on a roof asking “What have I become?”, the comic show Rick to be alive, though mumbling in insanity.


From there, the adaptation goes into its own scene as Louis and Julie have arrived back at her penthouse. Within some dialogue they originally shared at the “City of the Future” ball, he asks her about the Bellasarious Memorandum, to which she exclaims her belief that it went up in explosive flames at Westlake’s lab. After he exclaims that her grief won’t take a break, we then have an original conversation where he makes an emotional play towards her. He expresses his admiration for her helping his company out in the Von Hoffenstein negotiations, to the point where he’s talked to her boss Ed Pappas about exclusively acquiring her for his company before calling up a company bid in the Zurich market. Through that, he exclaims that while said financial business helps in making him feel young, it can be a bit attention-seeking due to the difficulties he faces as the head of his own company. Afterwards, she asks him if he was previously married, to which he exclaims that he was before he ultimately lost his bride to a private airplane crash in the mountains. Louis then says that he doesn’t like things that’re out of his ability to face, to which Julie admires his patience and kindness as they hold hands, unaware that Darkman is watching from afar.


Later, Peyton is back at his hideout testing another batch of synthetic skin. Unfortunately, it’s not able to remain stable after 99 minutes. With yet another failed batch, he becomes emotionally unhinged as he rips off a water pipe and begins to strike the crates while calling himself a “freak”. Fortunately, he’s able to calm himself down as he tells himself to control his rage and “think objectively”, since he’s still a scientist. Shortly afterwards, his machine has completed his facial reconstruction. Aside from a few bits of extra dialogue at the beginning, the adaptation still plays this scene out the same way as in the film.


Moving on, we have Julie visiting Westlake’s grave. Suddenly, Peyton approaches her with his reconstructed face as she’s rightfully shocked to see him alive again. He explains that he was in a coma in a hospital as they ultimately share a big hug and she assures him that things can still be the same between them. From there, he exclaims that he only needs “a little time” to explain “everything”. For some reason, the comic interrupts this moment by having his face begin to disintegrate as he’s forced to run off. Afterwards, there’s a moment of scene arrangement where Darkman wiretaps a phone call between Robert and Rudy. In the call, he hears Durant learning that Guzman hasn’t been able to procure some money from L.A’s Chinatown and thus, he wants to meet Hung Fat to acquire this payment. As Robert works on his severed finger collection, he allows Rudy to pick him up at 8:30am. From there, the adaptation backtracks to Peyton’s conversation with Julie. He says that he still needs her, since the lab explosion has left him in a shaken state, even asking if she would stand him if he was “horribly scarred”. She admits her romantic devotions towards him and that he doesn’t need to ask her since they’re together again. From there, the comic omits Darkman creating a face mask in Robert’s likeness while training himself to sound like him. Later, he goes into a convenience store disguised as Durant and robs the business, while displaying his face and saying his name towards the security camera. As such, the real Robert gets arrested by a pair of cops.


From there, we have Darkman-as-Durant heading into a Chinese Restaurant to meet with Hung Fat and collect his money. However, he calmly explains why he’s unable to pay up. From there, Peyton-as-Robert exclaims to Hung Fat that he only has until he’s done smoking his cigar to pay up, even cutting it up to a small size as an intimidation ploy. The comic omits the faux Durant lighting it up to smoke and even placing the lit match underneath his hand, easily withstanding the burn that he doesn’t feel in a display of sadistic power. Ultimately, Hung Fat caves in and agrees to pay up. Unbeknownst to them, the real Robert has arrived in Chinatown following his bail attempt. From there, the genuine & pretend Durant cross paths and get into a tussle while Rudy is unsure on who’s the pretender and who’s his actual boss. After picking up the cash-filled suitcase, Darkman’s disguise is about to reach its 99-minute limit and starts to disintegrate as he’s forced to flee. Robert, Rudy & Skip chase after him, but Peyton ultimately escapes and leaves behind the melted remains of his fake face to close out Issue 2.


Issue 3 opens with Peyton and Julie attending an amusement park. The comic omits her noticing that he’s constantly checking his watch and thus, he attempts to tell her the truth before he gets distracted by the commotion of a sideshow attraction that’s showing a beast man. In the end, he ultimately asks her if she was seeing someone while he was in the hospital, to which she says that she was, but strictly for kind comfort. From there, they head over to the midway games as Westlake attempts to knock down a stack of bottles in order to win her a pink elephant. As he takes his first two shots, the adaptation leave out a bit of dialogue between them where Julie asks him if she can accompany him back to the hospital for his “therapy”, but he refuses since he doesn’t want her to see him as a “freak”. As he says that, he throws his third and final shot with his enhanced strength in order to knock over the bottles. However, the Carney refuses to give him his prize, claiming that he stepped over the line. This causes Peyton to become emotionally unhinged as he proceeds to harm the guy in different ways. In the comic, Peyton tosses the man into the bottles while the film sees him grabbing the guy’s fingers and bending them back with enough force to break them before picking him up and throwing him through the back of the stand. Either way, Westlake grabs a pink elephant for his girlfriend, but she’s shocked by what she just saw. Suddenly, his synthetic face’s 99-minute limit is about to be reached as he’s forced to run off.


From there, she follows him back to his hideout. As she makes her way inside, she discovers his lab equipment as well as his disintegrating face mask. With her now completely aware of his secret, she says that he shouldn’t have kept this from her and that she’s more than willing to help him out. However, he’s too ashamed to emerge from the shadows and reveal his burnt face to her as she ultimately takes her leave.


One day later, Julie is at Strack Industries as the comic leaves out the detail of her telling Louis that she can’t see him anymore. From there, she informs him that Peyton is still alive. From there, the adaptation adds a detail where she exclaims that Westlake has been burnt and that he needs her help. Louis then asks how badly her boyfriend was mutilated, to which she wearily says that “he was mutilated very badly”. Either way, Strack gets a phone call and excuses himself to take it as Hastings discovers the Bellasarious Memorandum on his desk. Robert then catches her snooping at his desk as she realizes that he was behind the destruction of Peyton’s lab, to which Strack admits that Durant is “an employee who does certain things” for him. He then says that he won’t kill her since she lacks the necessary evidence to get him arrested, even exclaiming that the police are “quite unsympathetic”. Louis then attempts to sway her again by exclaiming that nothing should get in the way of his building plans for Los Angeles. However, she’s not on board and say that she has “things to do” before being allowed to leave. Afterwards, Strack is approached by Durant as Louis mentions about how his group was behind the intentionally planned attacked on his father (at least in the comic) before informing the crime boss that Julie has discovered their partnership. Strack then tells him that Dr. Westlake has survived his attack and thus wants this dangling thread taken care of. When Robert asks where they can find him, Louis simply exclaims that they “have a guide”.


Later, the adaptation jumps right into Durant’s men invading Peyton’s hideout as one of the goons contacts and informs him that they’ve successfully kidnapped Hastings off-panel. This is in stark contrast to the movie where she returns to the abandoned factory as she and Darkman briefly share a heartfelt look before the goons arrive to abduct her. The comic then omits Peyton taking to the roof and attempting to keep up with his girlfriend’s captors before he’s confronted by Robert in a helicopter and is forced to evade the crime boss & his grenade launcher. Either way, Darkman is in the factory as he begins his stealthy attacks upon Rudy and Smiley. First, he gets the surprise drop on Guzman. Then, Smiley smacks an approaching figure who looks like him and takes the mask off to reveal Peyton. After gunning him down, Smiley soon discovers that it was a second mask as he finds out that he accidentally executed Rudy.


Afterwards, he’s immediately approached by Darkman who’s dressed up like him (mask and all) and gets beaten up. Afterwards, the comic then omits him approaching Durant in the helicopter after having just put on another Peyton face. During the struggle, the adjacent hook drops down and begins to dangle. From there, Smiley sees some flammable gas emitting, as well as the drinking bird about to hit the lighter. The goon reaches it in time, only to discover that it’s a hologram created by the equipment. By the time he notices the genuine bird, it’s too late as it clicks the lighter, ignites the gas and blows up the factory. From there, Darkman hangs onto the helicopter by a rope latter in the comic (or hook and wire in the film) as he gets flung around the city, omitting a moment in the movie where a police copter joins the chase before getting eventually blown out of the sky by Durant’s grenade launcher.


Afterwards, he and his pilot attempt to use the oncoming traffic to shake Darkman off (which is where Sam Raimi’s signature 1973 Oldsmobile Delta 88 pops up), with Robert even attempting to shoot him with the grenade launcher to no avail. After landing on top of a convoy, Peyton ties the ladder onto the big rig (or connects the hook onto it in the movie) as the helicopter gets dragged to the top of a tunnel, causing it to crash and explode, seemingly taking Durant out. From there, an adaptation-exclusive scene occurs as Darkman interrogates Skip for the location on where Julie has been taken in a similar fashion to how he handled Ricky in the film.


We then shift over to the construction site of a skyscraper as “Durant” meets up with Louis and his hostage Julie. As they take the elevator up, Strack says that his previous wife had exclusive access to certain “deeds”. As such, he was the one who set her up on a fatal plane trip into the mountains in order to acquire her financial assets. After they reach the top and he mentions about Robert’s “kids”, the adaptation then omits Strack explaining his background where his dad had him working “high-steel”. Not only that, but it also leaves out one last goon looking after their hostage. Either way, he reveals that Durant doesn’t have any children as he relieves Darkman of his false face. From there, Louis taunts him by claiming that while he only destroys “to build something better”, Peyton only “destroys”. Strack then flaunts his power by stating that he “built” his vision of a better Los Angeles before the film then has him hopping around steel beams while he monologues and continuously evades Darkman. Shortly afterwards, Westlake somehow vanished from sight. Meanwhile, the adaptation had him immediately retreating to higher ground after his false face was removed. Either way, Peyton dives onto him as they begin their climatic struggle. Because the comic omits the lone thug looking after Julie, it omits the part where she briefly smacks the goon before he recovers and pushes her off. Thankfully, her cuffs managed to catch onto some adjacent pieces of rebar. It also leaves out Strack and the henchman attempting to use a series of hooks against Darkman, but Peyton noticed that a lone hook was right next to the fiend’s leg as he uses it to lift the thug up. From there, Louis grabs a rivet gun and fires away at Westlake. Because he struck the line, it caused the goon to fall to his death.


Either way, Strack continues his rivet barrage against Darkman, ultimately pinning his hand to a steel beam. Unfortunately for Louis, he decides to gloat about how he got to “intimately” know Julie and even calls Peyton a “freak”. Thankfully, Darkman’s unhinged emotion comes into play as he rips his pinned hand free of the rivet and fights back. The adaptation then omits Julie slipping from the rebar and resuming her fatal fall, only for Westlake to swing in on a hook and save her before swinging back to kick Strack off. With his life in Peyton’s hand, Louis tells him that he’ll become “as bad” as he is if he’s dropped to his death in an attempt to psyche his way out of this situation. Louis even tries to exclaim that this isn’t “an option” for him, since it wouldn’t be something he could “live with”. However, Darkman decides to have Strack freefall to his death before exclaiming that he’s “learning to live with it a lot of things”. Afterwards, he and Julie begin to make their way out of the site as she says that his disfigurement doesn’t bother her. However, he exclaims that he previously told himself that he was able to prefect his synthetic facial mask in order for her to care for who he internally was. However, he says that along the way, “the man inside” has “changed” into a “monster”. Not wanting her to live with this burden between them despite her willing to recapture their “old life”, he simply exclaims that “Peyton is dead” before running off. From there, the story ends in different ways. In the movie, he uses one last facial mask to disguise himself as a Final Shemp (played by Bruce Campbell in a cameo appearance) in order to vanish into the L.A. crowd. In the comic, he reappears within a dark alley, scaring some hobos away and laughing manically.


With the film having a successful theatrical run, it naturally turned into a media franchise. As such, there was a video game that was released in 1991 for the NES, Commodore 64, Sinclair ZX81 & Spectrum, Amiga, Amstrad CPC and Atari ST, while the Game Boy wouldn’t get its own game until 1992. Ocean Software published all of them, while developing the majority of them, with Painting By Numbers handling the NES port and Twilight Games working on the Commodore & Sinclair versions. On the TV front, there was a pilot episode developed by Universal Television that would’ve been shown on FOX in 1992. With Christopher Bowen set to take over as Dr. Peyton Westlake/Darkman and Larry Drake reprising his role as Robert G. Durant, it would’ve also introduced new characters like Kathleen York as a police officer named Jenny. It also would’ve presented an altered version of our hero’s origin, like Peyton being already married to Julie and having her dying in the lab explosion. Not to mention, his headquarters would be located in an abandoned observatory and he would even be an enemy of the law. However, it ultimately never came to be. Fortunately, Marvel would get one last run with the character with a six-issue series in 1993. Kurt Busiek handled writing duties for this arc, while Javier Saltares took care of the penciling position and Andrew Pepoy handled the series’ inks. As far as coloring was concerned, Steve Mattsson handled the first two issues, Sarra Mossoff dealt with Issues 3, 5 & 6, while Ed Lazellari took lone credit for Issue 4. So, how did Marvel handle their own continuation of the character’s inaugural outing? Let’s don our synthetic skin masks and head in to find out.


We open on the L.A. waterfront as a new crime boss named Scars has now claimed it as his own ever since Robert’s supposed demise. At this moment, Eddie Black has arrived and demands to reclaim his former territory. Scars mentions that he heard about Durant slicing off Eddie’s fingers with his cigar cutter before suddenly, Black retaliates by shooting him as it turns out that he received cybernetic hands with built-in gun functionality. From there, his men pop out of the adjacent truck and proceed to shoot up Scars’ men.


We then shift over to an abandoned church where Julie continues her weeks-long search for Peyton. Like before, she says that she’s not bothered by how badly mutilated he became and that she’s still willing to be in a relationship with him. From there, she exclaims that she’s since left her previous job as a lawyer and now works out a hospital. However, she doesn’t find him as she gives up on her search and leaves. Unbeknownst to her, Darkman was hiding up in the rafters.


From there, he mentally thinks about the film’s events and how he wound up in this situation. He recalls his past relationship with Julie, his experiments with Yakitito on trying to perfect synthetic skin that refuses to remain stable in the light past 99 minutes, Robert & his goons beating him up & killing his lab assistant during their search for the Bellasarious Memorandum, his lab getting blown up, his body found & placed in a hospital where he gets the Rangeveritz Technique to prevent him from feeling physical pain & sensation at the cost of amplified emotions & added adrenaline (where the previously-unnamed Burn Doctor is now known as Dr. Hermione West) and escaping in order to return to Julie, only for her to be terrified simply out of not recognizing him. As such, he vowed to get revenge on Durant and his goons.


From there, he goes on his vengeance quest where he learns about Robert’s operations and even disguises himself on a few missions while the goons slowly get axed off. Peyton even recreates his own face in order to be with Julie again, but it’s not able to remain stable after 99 minutes. Eventually, he takes out the remainder of Durant’s men before seemingly taking out the crime boss and true mastermind by the end. However, he’s not willing to stay with her. Even worse, he doesn’t believe that Robert is truly dead as he vows to find out.


We then shift over to the Metropolitan Club as a news reporter is covering a group of women protesters voicing their displeasure about the organization’s exclusionary policy. While the building was originally created with the purpose of allowing “a meeting place for all who desire to help our city grow and prosper”, it’s since turned into a male-only “walled haven” for “not-so secret rulers” to make devious dealings between each other. Inside, the members are having a meeting with their club chairman Sanford Lowell. The corrupt LAPD Commissioner mainly hears about their shady dealings running smoothly before hearing about Eddie Black’s waterfront-based business before a fellow member named Claude Bellasarious agrees with him in the fact that Durant was wrong about said crime boss.


Meanwhile, Darkman is at Robert’s former mansion. He snoops around for clues before coming across a storage box, which contains his morose collection of severed fingers. After noticing the familiar ring on one of them and realizes that it belonged to his deceased lab partner Yakitito, Peyton yells out that he’s on Durant’s trail. Later, he’s out hopping across the L.A. rooftops as he continues his search for any possible lead on Robert possibly being alive. Ultimately, he comes across a lackey named Spiv Hansen who’s taking a long and roundabout route back to his apartment. Just as the guy makes it back to his abode, he notices a brief movement of his closet door and decides to head over to investigate. Suddenly, Darkman pops out and pulls him inside before ordering him to tell his “boss” that he’s coming for him.


Later, Spiv meets up with his fellow cohorts during the preparation of an illegal car part transportation operation and tells Big Tony Grimm what he’s been told. However, Grimm isn’t buying it since he thinks that Robert is dead and is under the belief that Spiv came up with this under a drug-induced state. Unbeknownst to them, Darkman is watching them from the roof before he disrupts their illegal operation by dropping down some C4 explosives. With the warehouse blown up, Big Tony and his men start to believe that Spiv was right about his warning as they decide to “check in” on it, unaware that Peyton is watching them from afar. From there, Darkman continues his search by disrupting both a gambling and loansharking operation before telling the head fiends to inform Robert that he’s coming for him. Meanwhile, Eddie gets a phone call from Sanford who warns him about their operations getting interfered with. Black assures him that he’s more than capable of dealing with this menace, to which Lowell commends his confidence and reminds him to call up the police if he’s in need of assistance to take down Darkman. Upon hearing that codename, Claude snaps his cigar as he realizes that the man who took down Durant is possibly coming after him. Sanford attempts to assure him that the Metropolitan Club protects their own members, but Bellasarious voices his doubt towards Powell using his club status to operate within his “own private playground” at the expense of fending off outside factors that threatens the organization.


Later, Claude contacts Dr. West and informs her about his concern towards Sanford before imploring about their “friend”. She says that there hasn’t been any change, due to a series of medical complications, though she promises to keep in touch if any developments arise. At that moment, Julie arrives and meets up with the hospital’s administrator named Dr. Donald Coe. During their discussion, she informs him that she’s joined the hospital’s legal department, since it provides some lawful protection towards his “Endocrinology Research”. After she asks him if she has some spare time in order to get familiar with his job position, Donald says that his mind is presently cluttered, though he would like to present himself over dinner with her. Hastings initially smiles from this offer, but he slowly reminds her of prior boyfriend. As such, she worriedly says that she’ll get back to him on his offer before taking her leave. Back over at his hideout, Darkman feels like he’s getting close to his goal. Having already taken several reference pictures for his machines to work off of, he begins to prep a disguise for an upcoming mission.


Later, Eddie is having a phone call with Coffey and chastises him for his incompetence against Darkman. However, he soon finds out that his current foe was on the line all of this time and imitating the goon’s voice. From there, he tells Black that he’ll be coming after either him or Durant. After hanging up, his men worriedly advise him to take up Powell’s protection offer, but Eddie loads a round into his gun hand and says that he doesn’t need anyone’s help. Later, he and his men are taking part in some illegal waterfront activity. All of a sudden, several goons get rocked by a series of explosions, forcing the whole group to hide out inside the warehouse. As the main door closes, one remaining thug is running as fast as he can to make it inside. Fortunately, he manages to dive & roll his way in as the door locks the group in. Shortly afterwards, Black notices that the guy who hurriedly got in is suddenly missing. From there, they see a disintegrating face mask and discover that Darkman is hiding out within the building. As such, they split up in order to find their target. During their search, one particular thug named Karl gets picked off by Darkman who proceeds to disguise himself as the thug before he slowly takes out each of Eddie’s men. By the end, a few of the remaining goons hears Guy’s scream of terror as they head over to investigate, discovering Darkman looming over his body. From there, he instills enough dread within them and forces them to run away.


Over in his main office, Black is hiding out before telling his fellow henchman named Pfarrer to see how things are going in the warehouse. Not too long after taking his leave, some commotion goes down before Pfarrer runs back in and frighteningly tells him to “bar the door”. Shortly after Eddie does so, the disguise gets dropped as Darkman proceeds to reveal himself. Black shoots him, but Peyton doesn’t feel the wound as he dives right towards the crime boss. A struggle ensues as Eddie manages to rip up the face mask and gets briefly freaked out from Westlake’s face. Just as Black is about to fire his cybernetic hand guns, Darkman holds back his hands. As Eddie yells that he’s going to kill him, Peyton’s unhinged rage gets triggered.


With his enhanced strength, he rips off Black’s cybernetic hands and demands to know where Robert is. However, Eddie tearfully says that Durant is dead as Darkman believes him and wanders off. He then sorrowfully cries out that Robert can’t be deceased, since he feels robbed of his righteous revenge. From there, Issue 1 ends over at the Murnau-Sprang Medical Center’s Intensive Care Unit where a familiar figure is lying completely bandaged before he suddenly wakes up.


Issue 2 opens with Peyton on top of a church as he broods about his current state of emptiness, since he believes that he’s forever lost his relationship to Julie and his chance at revenge against Durant. Suddenly, he hears a scream over in the nearby cemetery and heads over to investigate. He soon finds a homeless woman tied up to a stake and being burned as he allows his enhanced rage to kick in, allowing him to reach her and smother the flames. After noticing a fleeing witness, Peyton dons a facial mask before picking up the badly-burned woman. She tells him that someone had called her a witch and that her cats were called “Devil’s Imps”. After assuring her that her kittens were safe, he proceeds to carry her to the Murnau-Sprang Medical Center.


Later, she’s taken into the Emergency wing as a police officer named Brian Kelso exclaims how the woman is another victim in a recent string of stake burnings and that it’s unlikely that she’ll pull through. The nurse named Rose then exclaims that the man who dropped the lady off vanished as soon as he arrived before Kelso mentions how besides himself, the rest of the police department doesn’t care about the homeless destitute. He even admits how helpless he feels right now, since his need to help others is why he became a cop. Unbeknownst to them, Peyton had been hearing their conversation from afar and feels the frustration that Brian feels. Suddenly, he sees Julie walking by as he proceeds to follow her. She ultimately comes across Donald who offers to help her with her emotionally troubling times and that he’s open to chat with her. As he looks from afar, Westlake’s mind flashes back to his pre-Darkman days and relieves some brief moments of his relationship with her. As Hastings accepts Coe’s hand in friendship, Peyton’s 99 minutes are up as his face mask begins to deteriorate. As he flees from the hospital, Donald barely notices it while Julie recognizes her prior boyfriend.


Later, Darkman is back at the graveyard as one of the lady’s cats patiently waits for its master to return. He tells the feline that she’s not coming back before attempting to pet it, but he ends up getting hissed at before it runs off. We then shift over to the Metropolitan Club as Claude tells Sanford that his longtime plan to sell off a riverbank area has been denied by Lowell’s own men. Claude explains that it’s inadequate timing, due to it being occupied by a large mass of homeless people. As such, attempting to force them out would cause further complications and “additional unrest”. Bellasarious criticizes him by exclaiming that they know what’s killing the bums off and that he’s more than capable of stopping this crime. However, Lowell refuses to involve the police with the organization’s affairs and that he’s still in charge of the group before taking his leave. Later, he arrives at an occult shop called Hermetic Ideas where he comes across the owner named Tad Whitelocke. He nervously tries to make up an excuse for why he can’t help him out, but Sanford refuses and even threatens him with a retractable blade in his cane.


As such, they proceed with the supernatural session as Lowell slips into a trance and finds himself in historic England where he’s now a Witchfinder General named Matthew Hopkins. After arriving in East Anglia, he approaches a woman at a fountain with potentially devious intent before she slaps him. Because he insanely justifies this as assuming that she’s a witch, he captures her before subjecting her to torturous acts, culminating with burning her at the stake. Afterwards, he meets up with the town magistrates who initially refuse to pay him when they didn’t even ask for his services. However, he ultimately convinces them through the effectiveness of his work as he gets rewarded before he heads out. As the seance ends, Sanford reawakens, though not as himself. It turns out that Matthew has been brought into this time frame and now that he’s in control of Lowell’s body, he dresses himself and prepares to hunt down those he deems wicked under his codename of Witchfinder.


Meanwhile, Donald is asleep at his apartment. Suddenly, he’s woken up by Darkman who tells him that he’s willing to allow him to comfort Julie. As such, he gives him a book called Child Ellen and takes his leave right before Dr. Coe is able to turn on the light.


As Peyton heads out with the knowledge that what he did was for Hastings’ happiness, he’s suddenly approached by Witchfinder and gets tied up by his whip. Westlake ultimately learns that this man was responsible burning the bag lady at the stake as his unhinged rage builds up and gives him the strength to break free from the lariat. From there, a brief fight breaks out before Witchfinder jabs his sword into Darkman. While Peyton withstood the strike, he soon finds out that the blade was laced with a narcotic drug as he proceeds to pass out.


From there, he dreams that he’s at a carnival with Julie as they’re approached by a clown who seems to know him and his relationship. From there, he reveals himself as Durant before he viciously strikes Westlake’s face, causing Julie to run off in terror. Afterwards, Robert continues to taunt him, especially with whether or not he’s alive. From there, Darkman regains consciousness and finds himself chained up within a dungeon as Issue 2 ends with the Witchfinder about to torture him.


Issue 3 begins with Michael holding up a simmering poker towards Peyton and ordering him to confess his sins. Despite being subjected to various torture methods, his severed nerves prevents him from feeling the insufferable pain. Instead, his mind wanders towards the events of the previous issue as he relieves how he wound up in this position. From there, he chastises Whitlock by saying that he only slaughters the destitute and downtrodden for personal pleasure. However, Witchfinder refuses to be swayed. Just then, Peyton’s face mask has reached its 99-minute limit and proceeds to fall apart, revealing the burnt remains of his true face. With his own self-convincing that Darkman is a “most foul” creature, he vows to make him break and confess before taking his leave. Later, he returns to Hermetic Ideas as Tad snaps Sanford back into conscious control of his body and proudly comments the “past-life regression” process. Whitelocke nervously states his intention to discontinue with this, but Lowell refuses to hear of it as he pays him and plans on returning.


We then shift over to the Murnau-Sprang Medical Center as Donald visits Julie and says that while he’s unsure why she’s been avoiding him, he still respects her reasons before giving her the book that Darkman presented him with. She explains that this is was a personal favorite of hers that was lost in the lab explosion before she ponders how she could have know about this. While he initially considers telling her the truth, Dr. Coe fabricates a tale where he saw it in a used book shop and that when he saw it, it reminded him of her. As she’s about to take her leave, Hastings ultimately decides to ask him out for a post-work meet, to which he accepts.


Back in the torture chamber, Darkman is unable to break free of his chains, mainly because he’s too weary to build up his unhinged rage. As such, he thinks up a scenario where the Witchfinder is attacking the bag lady. However, it’s still not enough. As such, he places Julie in the female hobo’s place. This finally allows him to build up enough rage for his enhanced strength to kick in and rip his shackles from the wall. As he makes his way outside, Peyton sees that the Witchfinder’s base is located off of Leroux Park as he also notices a few more hobos. Later, he makes it back to his abandoned church as he tells himself to stay focused on his original scientific endeavor of perfecting the synthetic skin. However, his machines begin to falter due to its damaged ram sectors. As they ultimately crash, Westlake takes care of the mechanical malfunction as he initially compares himself to his damaged skin-creating computers before he reasserts his self-determination. As such, he dawns himself with a set of clothes that he acquired from either Eddie Black’s gang or purchased with cash that came from said gang. Within his disguise, he heads over to the library in order to look up Matthew Hopkins. However, newspapers articles and biographical indexes come up as dead ends. Fortunately, historical references finally break through as he learns that this Witchfinder General was an Englishman who lived in the 17th Century. He went around and slayed anyone he deemed a witch and always demanded payment for his services. However, the biggest detail comes when he learns that Matthew has been deceased since 1647.


Later, Darkman hides out near the police station and starts taking reference pictures for his facial masks. With several shots of an officer named Frank in his grasp, he manages to have a false face developed and even have an official’s suit ready as he heads inside and manages to swipe the files about the burned bag lady. At the same time, Brian talks with Officer McKenna about how “there’s no special commission” towards the secret slaughtering of homeless people. However, Kelso gets told not to look into it since it’s on the commissioner’s plate. We then shift over to the Metropolitan Club as a reporter named Armitage arrives to work on a feature. However, the doorman named Washington refuses to let him in. After a club member is allowed entry, the reporter (who turns out to be Peyton) heads out to plan his alternate entrance into the building.


Later that night, Darkman arrives as he takes pictures of the banquet activity. Meanwhile, Sanford and Claude overhear the business talks of their club members as Lowell tells Bellasarious that the organization is more interested in acquiring tax exemption. As the party continues, Claude tries to chat about his own construction project over at the riverbank. However, Sanford overhears him and says that even though they’re getting tax shelters, the club members aren’t willing to invest in Bellasarious’ scheme. At that moment, Darkman recognizes Lowell as the Witchfinder and proceeds to smash his way inside, where he proceeds to accuse Sanford as a mass murderer. When one of the members offer to pay him in order to keep him quiet, Peyton discovers that they knew about the slaughtered homeless as he proceeds to grab a table and throw it towards the door, preventing the members from escaping. Suddenly, Lowell begins to shake until the Witchfinder takes control and engages Darkman with his sword.


Thankfully, Westlake manages to obtain his own blade as they engage in a duel. During this, Claude contacts the police and asks for Officer Kelso. Ultimately, the Witchfinder disarms Darkman and stabs him. Fortunately, Peyton withstands the strike and manages to break his foe’s arm. Afterwards, he hears the approaching police sirens and is forced to take his leave. Bellasarious then takes advantage of his newfound status, while Sanford proceeds to get arrested, especially since he verbally lashes out at reporter Brionne DeSantos while the Witchfinder is still in control. Unbeknownst to him and the cops, Darkman oversees this from the rooftops before taking his leave. From there, Issue 3 ends with Lowell back in control of his body, but behind bars with a massive scandal on his hands. Claude visits him and hands over a handgun with a single bullet in it as he tells Lowell that he no longer has “the votes anymore”. As Sanford takes his own life, Bellasarious takes his leave as he now has control over the Metropolitan Club.


Issue 4 opens with Julie and Donald out on a date, unaware that Peyton is observing them from afar. Despite the fact that his former girlfriend is out being happy again, a former longing for her begins to stir within him. He initially considers making another synthetic mask in order to be near her again, but he restrains himself before taking his leave. We then shift over to the next day over at Allard Park with Claude out walking with Dr. Hermione West. She says that there’s several “fascinating possibilities” that she would like to research and explore. However, she has a smothering amount of hospital work due to the abundance of patients. While he sympathizes with her plight, he exclaims about his daunting position where he’s now in charge of the Metropolitan Club, yet he’ll lose it if he doesn’t self-consolidate soon and sway the city’s mob bosses to his side. Not to mention, Darkman is a potential threat to his title. As such, she proceeds to inform him about their “mutual friend”, who was in a helicopter crash, has burns covering 90% of his body and has severe internal damage as well. When he asks if cloning is a possible option, she says that while it’s capable, it also comes with its own setback. Particularly, it would need to be mentally detailed. Not to mention, attempting a brain transplant is far too risky and would kill the new body. Suddenly, a RC car crosses their path and gives Dr. West a breakthrough idea that would help out, in terms of microprocessor technology, as Bellasarious promises to properly finance her experiment and present her with her own lab.


Meanwhile, Darkman is discreetly taking reference pictures of Dr. Coe’s face, even going as far as to wiretap his phone line in order to record his voice and practice with, despite knowing that all of this is morally wrong. Over at the hospital, Donald learns the bad news as the medical center’s board of directors has just ruled that they’re denying any patient who’s not able to pay for their treatment. Officer Kelso is also there as he agrees with him, despite the fact that his fellow cops have to enforce this new ruling in order to force the homeless out of their Riverbank Shantytown. Just as Dr. Coe says that he’s going to bring this up at the next staff meeting in order to see what his fellow doctors think about it, he’s suddenly approached by Julie. As he proceeds to kiss her, Darkman takes one last profile picture of him before heading out.


Over in her lab, Dr. West and her assistant Shelley are overlooking the creation of a clone body. Shelley attempts to ask for a pay raise, due to the shady nature of this experiment. However, Hermione threatens to inform the American Medical Association about him practicing without a proper license in order to keep him in line. Back at the rundown church, Peyton begins to perfect his voice and sound like Donald, just as his new synthetic face is created. Despite initially thinking better of it and destroying it, he just recreates the false face and decides to go through with it.


We then shift ahead to several weeks later as Claude checks up on Dr. West’s work. Despite the fact that she’s not quite done, she reveals the clone body to him and says that she’s included “a few improvements”. Impressed with what she’s done thus far, Bellasarious leaves her to her work. Meanwhile, Julie is out on a dinner date, unaware that Peyton has disguised himself as Donald, though she does notice that he’s barely talking to her. As she begins to share certain details about herself, Westlake-as-Coe thinks to himself how he already knows so much about her, even remembering when they were kids and received a kiss after bandaging her finger following a splinter incident. As Hastings asks about his suddenly silent nature, Peyton-as-Donald says that he’s fine and only had a long day of surgery.


We then shift to the next day as Julie comes across the actual Dr. Coe. Just before he gets asked about things that he didn’t hear about due to not actually being at the date, they suddenly hear an argument as a nurse named Robinson who confronts Hermione on the whereabouts of their comatose burn patient, to which Dr. West simply states that he “checked out” and then chastises her for not keeping up proper records. With this incident serving as a proper distraction, Julie decides to head back to her office in order to deal with her paperwork. Over at the West Research building, Hermione and Shelley are about to continue their work on the clone body. However, that further work involves Dr. West taking an ax and proceeding with the operation in bloody fashion.


Meanwhile, Donald is standing outside of the Caligari Square Revival House waiting for Julie to arrive. Unbeknownst to him however, she’s back on her apartment conversing with whom she thinks is Dr. Coe, as she mentions how she’s had an interest towards “moody men”. As Peyton-as-Donald sits in silence, his mind races with thoughts about her falling in love with the image of his false face, as even his thoughts conjures up familiar identities to chastise his action. He even thinks up a twisted wedding between himself and Julie where her guests are regular humans, while his are demented beings. As such, he tries to leave. However, she’s standing between him and the door. On that note, she’ll only let him go with a certain toll payment. By that measure, she proceeds to kiss him. Meanwhile at the Metropolitan Club, Claude is setting the groundwork for his riverside development project as he looks to lay the foundation within the next several months by forcing some “undesirables” out of the area. Just then, he’s contacted by Hermione and is informed to meet her at a particular location in order to show off her finished desgin. Back with Westlake-as-Coe, he’s in the middle of a passionate makeout session with Hastings. Just then, his timer beeps to indicate that his 99 minutes are up. As such, his false face deteriorates right in front of her as he’s forced to apologize for his action before he smashes through her balcony door and jumps off.


Afterwards, Issue 4 ends with Bellasarious arriving at Durant’s former home as a butler directs him into the study. Upon his entry, Claude is shocked to see what Dr. West has accomplished. It turns out that she’s recreated Robert, though with a head that’s able to operate away from his body.


Issue 5 begins with Darkman on the roof of his abandoned church as he feels emotionally guilty over his selfish action of interfering with Julie’s current lovelife. Suddenly, he notices a hooker getting assaulted by her pimp for supposedly “holdin’ out” on him. Mistaking her for Hastings, Peyton jumps down to intervene. However, both are terrified of him as they run off. After feeling distraught from his action, he decides to approach Julie as Westlake in order to apologize for what he did before he leaves her alone forever. As such, he heads back into his hideout and preps a synthetic face mask in his original image.


Meanwhile over at Durant’s mansion, several crime lords have gathered as Claude presents them with a solution to their lack of “leadership in this city”. From there, the men become shocked to see Robert standing among them once again. Durant then demonstrates his new clone body to his fellow gangsters, complete with detachable head. However, a fellow goon named Tony felt the need to make a joke about Robert’s new pop-off head as he hears that and initially threatens to slice his finger off with his cigar trimmer. Durant then decides against it and instead, he rips Tony’s arm off. Later, a maid named Maria is cleaning up the bloody mess left behind by the incident as Robert tells Bellasarious that he enjoyed his demonstration of reasserted power as it turns out that they’re going to join forces and rule over L.A.’s “fragmented mobs” by bringing them together as one unit. When Claude then asks how they’re going to deal with Darkman, Durant assures him that “it’s been taken care of”.


Over at the Murnau-Sprang Medical Center, Julie is feeling emotionally distraught due to Darkman’s recent action and feels that he could be anyone she comes across. As she attempts to leave, the actual Dr. Coe shows up as she expresses her uncertainty on whether he’s real or a false identity. Suddenly, they’re approached by a group of thugs who proceed to kidnap Hastings before telling Donald to inform “him” to meet them at “the old Strack project”. After they take their leave (even locking the staircase door so that no one would follow them), Peyton arrives and learns about the recent hijacking, including the meet-up place. As such, he ducks into a room and discards both his facial mask & trenchcoat before escaping through the window. As he runs across the rooftops towards his destination, he ponders about how the corrupted elite have been able to bump off the city’s destitute while the public ignores their actions and that he hasn’t been confronting them due to his own self woe. Now, it’s become personal due to the abduction of his former girlfriend.


Eventually, he arrives at the construction site for Strack City as he notices Robert carrying Julie while he’s climbing the unfinished building. Darkman ultimately catches up and manages to tackle Durant before he discovers his foe’s newly-detachable head. This distracts him long enough for the rest of Robert’s body to attack him, though Peyton manages to grab a nearby hook and save himself.


From there, he tells Julie to get in the elevator. However, she’s too exhausted and distraught to do so. As Darkman gets assaulted, Robert tells her that she’ll force her to watch him mutilate her prior boyfriend. Peyton then receives a vicious and damaging hit to his ribs before telling her to get in the elevator, to which she finally does and makes her way down to the ground. As the police begin to arrive at the construction site, Durant says that the Metropolitan Club has lacked leadership ever since Lowell’s death and that he intends to take over that organization.


Darkman charges at the disembodied head in an attempt to stop him, but he once again doesn’t notice Robert’s body as it manages to trip him over the side. Peyton manages to grab onto the ledge, but he’s unable to pull himself up due to his broken ribs. As his head rejoins with his body, Durant grabs Darkman’s wrist and pulls him up as he exclaims that this is why he had Julie kidnapped and that he didn’t have his henchmen here in order to personally get his revenge. Just then, a ground-level police officer tells him to “let that man go”. Robert decides to comply as he drops Peyton down towards the concrete base, while Hastings tearfully watches. Fortunately, Darkman managed to twist and flail enough to redirect himself towards the water as he ultimately lands there instead. However, Julie arrives and doesn’t see him come back up as Issue 5 ends with her screaming Peyton’s name in terror while Durant smokes his cigar.


Issue 6 opens with Hastings wearily informing Officer Kelso on what happened. Meanwhile, Robert rejoins Claude and gets praised for taking out Darkman. However, Durant says that he won’t feel completely satisfied until they comb the nearby rivers and piers until he sees his foe’s deceased body for himself. As the morning sun dawns upon the city, a shanty town and its large group of homeless citizens soon discover an unconscious Darkman floating into their area.


Back at the Murnau-Sprang Medical Center, Julie talks with Brian about Peyton, specifically how he became Darkman and that he used to work on creating artificial skin. Afterwards, Officer Kelso asks her about her recent kidnapping and if she knows anything about either Claude Bellsarious or the Metropolitan Club. However, she’s still paranoid towards Peyton and his disguises. As such, Brian tells her to rest up before telling a fellow nurse to find a way for Hastings to get home. Over at the Metropolitan Club, Claude informs Durant (via a mole within the department) that the police was unable to find Darkman’s body and that he possibly wound up at a southshore Shanty Town. Because that sector of town has been a longtime annoyance for him, Bellsarious tells Robert to take his men and have the entire area cleared. As night falls, Peyton regains consciousness and gets nursed back to health. Unbeknownst to the hobos, Robert and his fellow goons preps their guns for the upcoming invasion as Durant tells them to leave Darkman for him.


Meanwhile, Westlake asks a pair of hobos (which includes the female who helped him recover) why they were willing to share their limited food supply with him in order to properly heal him, to which they essentially say that they naturally help each other out. Realizing that they see him a regular man, Peyton thanks them for their kindness. Suddenly, Robert and his men show up and proceed to open fire upon the hobos. This causes Darkman’s unhinged rage to surge as he jumps towards the goons and attacks them. He even evades the enemy gunfire from one thug before taking him out by tossing a round car part at his face. Afterwards, a pair of henchmen are covering the shanty town with gasoline in order to torch it all down. Even after a goon named Piggy shoots one of the hobos, Darkman retaliates by tossing a lighted match at the thugs and manages to incinerate them. At that moment, Officer Kelso sees the bright, fiery glow from afar. Even though the police had normally disregarded the shanty town and that Lowell’s replacement as Commissioner is also incompetent, Brian jumps into his cop car and calls out to his fellow officers to help him out just as he heads over there.


Just as he arrives at the southside riverfront with a riot squad at the ready, Darkman has defeated every last goon that he has come across before he’s confronted by Durant and gets pinned down. Meanwhile, the riot squad guns down the remaining henchmen before they reach Robert. Fortunately, Durant trips him up and causes his detachable head to fall off. However, Robert has his body pick up Darkman and begins to rip him apart. With the thought of everything that his foe has destroyed in his thoughts, Peyton’s unhinged rage kicks in as he breaks free and damages Durant’s right arm, forcing his head to retreat from his body. This time however, Darkman manages to capture the fleeing cranium and uses it to viciously strike the headless body.


From there, Officer Kelso and his riot squad hold their guns at him as he tells Peyton to stop, or else he’ll be arrested. Darkman yells that his shot at vengeance won’t be taken from him. However, his facial bandages have unraveled as the pair of hobos who nursed him back to help are stunned in fear of him. This causes him to hesitate before Robert’s body is able to punch him away before attempting to reclaim his head. Brian orders the riot squad to fire away as Durant’s body withstands the bulletstorm long enough to toss his own head to safety. Several minutes later, the riot squad has unsuccessfully attempted to find Robert’s head. Not only that, but Darkman managed to evade them as well. Even though he can’t stay at the shady town, he decides to do something to help those hobos out.


Later, Donald arrives at Julie’s apartment and informs her that he’s leaving her. It turns out that there’s a job offer in Chicago for a teaching position that he took due to overwhelming events that he went through here in Los Angeles, not to mention the strain that their relationship took as a result. He then invites her to come with him, but she politely declines due to unfinished business that she needs to take care of. From there, the series ends at Bellasarious’ apartment as Darkman approaches him in his bed and tells him to inform his cohorts that the riverside hobos will no longer be oppressed now that he’s their protector. Claude tells him that he’s “a dead man”, but Peyton says that he essentially is and that he be “haunting” him before he leaps down and takes his leave.

Following Marvel’s run with the franchise, Darkman would go on to receive extra attention from various other forms of media in the mid-’90s. The character would have extra ventures within four novels (“The Hangman”, “The Price Of Fear”, “The Gods Of Hell” and “In The Face Of Death”), starting in 1994. From there, he made a return to film, albeit on a smaller scale. On July 11, 1995 & August 20, 1996, Universal would release a pair of direct-to-home video sequels where Bradford May took over directorial duties (as well as cinematography) and Arnold Vosloo became Dr. Peyton Westlake/Darkman. In “Darkman II: The Return Of Durant”, the infamous crime boss somehow survived his fiery helicopter crash and only ended up with a coma. Now, he’s come back and wishes to acquire a new base of operations for his weapons factory in order to take control of the illegal arms race, especially when he busts out Dr. Alfred Hathaway and has him perfect a new particle beam rifle. Meanwhile, Peyton comes across Dr. David Brinkman, whose research could potentially help him perfect his own synthetic skin. However, the good doctor’s building is in Durant’s sights and he gets killed for refusing to hand it over. After meeting (and somewhat befriending) David’s sister Laurie, Westlake ultimately crosses paths with a reporter named Jill who’ll help him bring the fiendish crime boss down once and for all. As for “Darkman III: Die Darkman Die”, Peyton continues his attempt to perfect his synthetic skin. Fate seems to be on his side when he meets Dr. Bridget Thorne, who was apparently among the medical staff that gave Westlake his nerve-severing surgery. Now, she appears to help him finally stabilize his synthetic skin past 99 minutes. Unfortunately, she’s working for a drug lord named Peter Rooker as they capture him, steal his research and attempt to use his genetically-enhanced structure upon some hired thugs in order to assassinate up-and-coming District Attorney Ryan Mitchell. With Peter also neglecting both his wife Angela & his daughter Jenny, Darkman will look to protect them and stop Rooker’s diabolical scheme. Both were released through MCA Universal Home Video with both Raimi and the first film’s producer Robert Tapert serving as executive producers. Originally, “Die Darkman Die” was supposed to be the immediate follow-up to the inaugural entry, but “Return of Durant” took its spot when Larry Drake was available to reprise his role. These entries were filmed back-to-back from November 15 to December 20, 1993 and both were shot in Toronto. Unlike its theatrically-released counterpart, both were less-than critically well-received and would ultimately be what sent our flawed scientist out of the public eye for a while.

After the franchise took a decade-long hiatus, our final stop for this retrospective sees our titular hero in a crossover tale with another Sam Raimi-created property: “Darkman Vs. Army Of Darkness”. Published by Dynamite Entertainment, this four-issue mini-series came out in October and December 2006 before wrapping up in February and March 2007, which went on to sell 44,404 individual issues combined. Kurt Busiek returned to write this tale alongside Roger Stern, while James Fry handled the artwork. In terms of coloring duties, David Curiel only tackles the first issue, Bruno Hang is limited to the second part, while Ivan Nunes does work alongside him for said chapter before taking over for the last two issues. So, what situation requires these two unlikely men to join forces? Let’s grab our synthetic skin masks and boomsticks in order to find out.


We begin in Los Angeles as Darkman oversees Julie on a date with her new boyfriend named Tony. He captures their nighttime stroll with his digital camera and his audio receiver as he remembers when he used to be romantically involved with her before the fateful lab explosion shattered that notion for him. Afterwards, he hears Tony informing Hastings that he has to go away on a business trip for a few days as she understands before they share a goodnight kiss before he heads on his way. Shortly afterwards, Darkman does the same.


From there, Julie enters an estate house and meets up with her assistant named Brynne Kelly, who compliments her newest romantic endeavor while commenting on how she hasn’t had much luck herself. Afterwards, they proceed with cataloging the various items within the building before Brynne presents her with a familiar book, which turns out to be the Necronomicon Ex-Mortis a.k.a. the Book of the Dead. Kelly explains that she managed to partially transliterate the text and make it pronounceable as Julie begins to read it, unaware of what she’s about to unleash upon the City of Angels. Meanwhile at the City Morgue, a mortician is examining the corpse of a gunshot victim. Suddenly, all of the deceased bodies come back to life as Deadites and attack him. At that same moment, some patrons are have a lively conversation over at a bar called Josey’s. All of a sudden, one guy punches another before the bartender tells him to leave. However, the man and the rest of the customers (excluding the bartender) have been turned into Deadites and begin to wreak up the place.


Back with Julie, she’s unable to stop reading the devious book as Brynne is getting freaked out by it before the book releasing a malevolent force that shatters the estate’s windows. Meanwhile, Darkman looks over his newest pictures of Hastings before he thinks back to the events of the first film where he used to be in a solid relationship with her while he worked on perfecting his synthetic skin. From there, Durant came along with his goons to look for the Bellasarious Memorandum as they killed Yakitito, brutilized Peyton and left him for dead by causing his lab to blow up. Even though his body was recovered, his was ultimately given the Rangeveritz Technique upon his Spinothalmic Tract in order to no longer feel the physical burns or any other kinds of physical pain. However, the “side effects” caused him to have adrenaline surges which gave him feats of superhuman strength as he broke out. After recovering his lab equipment, he got to work on creating a face mask in his former image. Even though he got to be with Julie again, two factors prevented this reunion from becoming permanent: 1. The medical technique also gave him bits of uncontrolled rage & 2. His synthetic face masks still couldn’t survive in the light past 99 minutes. Even though he ultimately defeated Robert and then saved her from Louis Strack, Jr., Westlake couldn’t bare to be with her anymore and ultimately ran off before we cut back to the present.


Just as he’s about to head underground, he notices the sky turning devious before a jeep comes barreling down upon him. Darkman manages to leap out of the way and onto the vehicle where her finds a Deadite at the wheel. Peyton tells the man to stop, but the fiend refuses. As such, Westlake ultimately takes him out for good by ripping the Deadite’s head from his body as they crash into a car and flip over. Afterwards, Darkman hears a cry for help as he horrifyingly discovers Julie and Brynne being assaulted by a group of Deadites. Peyton dives in and saves them, but he horrifying discovers that Hastings has been turned into a Deadite as she calls herself the Queen of Darkness and hits with enough force to send him flying into a van.


Kelly hits her with the Necronomicon, but the possessed Julie retaliates with demonic eye beams. Fortunately, Brynne defends herself with the Book of the Dead before Darkman picks her up and flees. As the Queen of Darkness sends her fellow Deadites after them, Westlake assures Kelly that he knows who she is and asks if she has a key to the central library, since she works there on the weekends. She confirms it as they enter before he boards up the doors. Afterwards, she blames herself for bringing this situation upon them as Darkman calms her down and asks for an explanation. While the Deadites attempt to break down the door, Kelly assures Peyton that she didn’t know that she was transliterating incantations. When he asks her if she can “reverse the spell”, she exclaims that she did come across a later passage about “a legendary hero” who can get summoned “in time of great need”.


As such, they set up a table and some candles before they proceed with the incantation. All of a sudden, a vortex opens up before a familiar shotgun and chainsaw emerge from it. Shortly afterwards, a man comes flying out of the portal as it turns out to be Ashley “Ash” Williams. After introducing himself, he notices one last thing emerging from the vortex as he dives onto Darkman & Brynne and gets them out of the way in time for his 1973 Oldsmobile Delta 88 to come crashing in. Shortly after Ash realizes why he was summoned here, Issue 1 ends with the Deadite armada finally breaking the door down to confront the group.


Issue 2 opens with Westlake and Williams fending off the massive Deadite horde. During the massive fracas, Kelly is getting pursued by several more Deadites as they attempt to reclaim the Necronomicon for their master. Fortunately, Peyton manages to shove a massive bookshelf onto them. However, Darkman starts to get overwhelmed by the demonic beings before Ash rushes in to assist. Fortunately, Westlake’s adrenaline fueled strength allows him to fend the Deadites off. Suddenly, the Queen of Darkness arrives as Williams aims his shotgun at her.


However, Darkman charges at him and disrupts his aim before he calls out to Julie. Unfortunately, it proves to be ineffective as a Deadite manages to retrieve the Book of the Dead. Peyton tries calling out to her again, but Ash hits him with his shotgun handle and questions which side he’s on. A brief scuffle emerges between them before Brynne defuses their feud. She then assures them that they still have the actual Necronomicon as she explains that she took its cover and wrapped it around another random book. Williams commends her fast thinking before Westlake says that the Deadites are still dangerous without the demonic text. Ash then tells him that he’s very familiar with those beings, since he had to cut off his right hand due to it becoming possessed (see “Evil Dead II”). As such, Williams exclaims how “the only good deadite is a dead deadite”. However, Darkman refuses to let him harm Julie before Kelly explains that Hastings is her boss and that the Book of the Dead turned her into the Queen of Darkness, not to mention that they used to be a budding couple. Ash sympathizes, but also states how things like this can’t be helped, especially when his girlfriend (Linda) became a possessed Deadite and he was forced to slay her. Peyton tells him that it won’t happen before Brynne says that they’ll find a spell to get Julie back, but that they must focus on stopping the Deadites. However, Williams is reluctant in helping them out. Fortunately, her teary eyes manage to sway him back into the fold before Westlake suggests that they split up in order to find Hastings. Ash then asks where they can meet up later, to which Darkman tells him that he’ll “find” him as he discreetly places a tracker onto the car. Shortly after Williams drives off, Kelly asks Peyton if it was wise for them to split up, to which he says that he doesn’t entirely trust their new comrade and that he’ll find Julie before Ash does. From there, they head out in order to properly search the Necronomicon’s pages for a proper spell. Meanwhile, Williams is out driving through the zombified streets of L.A. before he comes across a fast food restaurant and decides to eat.


After placing his order in the drive-thru however, he finds the cashier to be another Deadite as he drives off in time. Despite that, the severed arm is still active as he fends off the evil limb and throws it out the window. After stopping at a red light to catch his breath, he soon notices a nearby S-Mart that’s being pilfered by a massive hoard of Deadites. Over at the construction site for Strack City, the Queen of Darkness is given the Book of the Dead, only to discover that the cover alone is the genuine article. As such, she smacks her precipitant away before taking a page from the actual book and magically fires a demonic beam into the sky out of anger.


Meanwhile, Darkman and Brynne arrive at his hideout as she finds it filled with pristine pieces of technology and lab equipment, even finding his series of synthetic face masks. Among those false faces is the image of deceased crime boss Robert G. Durant as Peyton briefly wonders why he even keeps it around before getting himself back on track. Kelly immediately gets to work by scanning every single Necronomicon page into the system while Westlake watches a newscast about the growing Deadite menace throughout the city. Afterwards, he checks his scanner and sees where Ash’s car currently is. Because he mentioned “tracers” during his recent statement, she realizes that he also placed one onto a Deadite as he explains how “experience” taught him “to plan ahead” before he prepares to head out and reminds her to call him should she need to get in touch. As such, she stays behind with the cat providing her lone source of company. Meanwhile at S-Mart, Williams has sneaked in as he attempts to acquire some shotgun shells for his signature boomstick. He then pretends to be a store mannequin in order to fool a Deadite guard, while learning that the demonic beings will be meeting up at Neeson Park within the hour.


Later, the entire Deadite hoard has gathered at the behest of their queen. Suddenly, Ash drives in and aims a bazooka at her. However, the Deadite guard pushes her out of the way of the shot and gets trapped within the deployed net. From there, the Queen of Darkness fends him off with a blast of demonic energy before using it to fly off while ordering her army to kill their foe. Ash proceeds to take on the Deadite hoard before he trips over his chainsaw and is about to get mutilated.


Suddenly, he gets some expected help from a Deadite mailman who manages to take Williams’ shotgun from another fiendish figure. Ash engages him in order to reclaim his signature boomstick, before the being reveals himself to be Darkman as they reach the car and head out. Peyton then implores about the bazooka that Williams just used, to which Ash says that he promised to not harm Julie before explaining that he found the riot-control bazooka within an abandoned S.W.A.T. van right next to the S-Mart. With that plan up in smoke, Issue 2 ends at Wyldwood with the Queen of Darkness resurrecting move corpses into her Deadite armada. From there, she comes across a key figure that she can add to her Army of Darkness: Robert G. Durant.


Issue 3 begins with the infamous crime boss getting resurrected before he’s magically given a proper business suit. With him pledging his loyalty to her, the Queen of Darkness lets him know that he used to cause “inconveniences” towards her in the past. After using her thumb to magically light up his cigar, she says that he didn’t do a good-enough job at attempting to bump off her host body before Deadite Durant mentioned that Darkman has twice sent him to an explosive end and destroyed his criminal empire. She then says that it’s why she brought him back before informing him about a book that their enemy’s group has in their possession and that if he gets it for her, then she’ll give him a new criminal empire. As such, Robert promises to exterminate their foe and his group.


Meanwhile, Peyton & Ash arrive at a parking garage, where they drive up to the roof and discover a small group of Deadites having set several drums ablaze. As such, they decide to engage them as Williams takes out one while Westlake easily defeats the others. From there, they look out and see that several buildings are on fire as Darkman says that accumulated smoke clouds has helped in prolonging his facial disguises. When Ash asks about it, Peyton takes off his false face and explains that his synthetic disguises normally last 99 minutes in direct sunlight, while his bodily burns came from an explosion caused by a particular crime boss.


Over at the construction site for Strack City, the Queen of Darkness is magically creating a temple as Deadite Durant asks why she didn’t also bring Louis Strack, Jr. back as well. She explains that he was cremated following his death and that Robert’s services are needed in order to lead her undead army while she’s putting her building together. He then asks about the various kinds of Deadites that they can rule over, to which she exclaims that while some of them are reanimated corpses, the rest are regular people that were magically turned. From there, he has his Deadite armada bring a captured guard to him where he viciously hits him with a golf club, thus turning him into a Deadite. With the initial spell still in effect, Robert says that this will help with recruitment.


Back at Darkman’s hideout, Brynne has finally scanned every last page of the Necronomicon into his computer system. Afterwards, she checks the news and sees that things are getting worse in the city, to the point where all bridges and tunnels have been shut down. From there, she contacts Peyton and informs him about the newscast. As such, he accesses streaming video functionality on his phone and finds Deadite Durant having taken over the TV station. After crushing his device in anger, Westlake takes Williams underground in order to hitch a “ride”. However, they come across another group of Deadites. Fortunately, Darkman came prepared as he takes out a remote and summons his subway train to come along and run over the ghouls. From there, they board it and ride off towards their destination. Over at the news station, Robert is being prepared for his next broadcast. Later, he’s back on the air for his version of AM Good Morning where he has a pair of anchors named Jasper and Katie tied up at his mercy. From there, he threatens to harm her if his “old friend” doesn’t show up soon.


Suddenly, the broadcast booth’s glass gets shattered upon them as Ash makes his presence known. Shortly afterwards, Darkman bursts through a wall and confronts Durant. However, Robert’s unnatural strength allows him to physically confront Peyton. Meanwhile, Williams is able to fend off the Deadite hoard in his own style. He’s then told by Westlake to get the hostages out of here while he continues to fend off his longtime foe.


As such, Ash gets the two anchors out of the studio before boarding up the doorway with a storage cabinet. Unfortunately, he finds out too late that they were just turned into Deadites. Suddenly, they get taken out by Darkman who gets viciously thrown through the storage cabinet and lands into them. Williams fires his shotgun at Robert, but he’s able to recover from his wounds. As such, Ash and Westlake are forced to retreat. With the Deadite menace continually growing out of control, there’s even a ghoulish mayor as a puppet ruler while a Deadite newscaster comically tells the news. Peyton and his group catch this back at the hideout, where they also learn about “a new museum” that was recently built. As Williams jokes about this being the start of a worldwide franchise, Kelly says that she came across something from the scanned Necronomicon pages. She explains how the Book of the Dead had a drawing of a temple that resembles the one that was recently built. Inside it, there’s some spells that contains “Rites of Reversal”, which she believes will inform them of an exorcising ritual that they can use on Julie in order to stop this devious operation. When Ash realizes that the book actually contained an exorcising spell that he could’ve used on Julie instead of slaying her, he runs off.


Back at the temple, the Queen of Darkness scolds Robert for letting our heroes escape, especially since they still have the Book of the Dead. Deadite Durant assures her that he has several of their own undead out looking for it before they convert our heroes onto their side, where they proceed to laugh manically. Meanwhile, Williams has retreated to the roof in a moping mood. As Darkman and Brynne approach Ash, he berates himself for not knowing about an exorcism spell within the Necronomicon before he ended up killing his Deadite-possessed girlfriend. Kelly tells him not to blame himself since Linda got possessed from a spell that came earlier in the book, while Julie read from another spell. Peyton then tells him that the Book of the Dead contains several spells before Kelly says that Linda couldn’t be saved. When Westlake asks him if he’s going to “sit there and let the deadites win”, Issue 3 ends with Ash refusing to do so and thus, he’s fully reinvigorated, ready to help stop this Deadite menace once and for all.


Issue 4 opens with our group arriving at the newly-constructed temple via the sewer system. Darkman tells Brynne that he would have preferred for her to remain in the hideout, due to him and Williams having more combat experience. However, she says that she respects Julie as a friend and not just as her boss. Not only that, but her Necronomicon research is what brought about their situation in the first place and she feels responsible enough to fix it. In addition, she’s armed with his taser. Afterwards, Peyton gives his partners some communicative earpieces so that they can properly coordinate their spell, right before they charge right into the building.


Deep inside the temple, Deadite Durant has his henchmen bring him a guy named Barry. He says that he doesn’t know where his adversary is, as Robert proceeds to snap his neck and turns him into a fellow Deadite lieutenant before ordering him, along with his undead comrades Pauly and Beau to hunt down Darkman’s group.


Meanwhile, Peyton easily takes out a pair of Deadites by slamming their heads together before they instantly disintegrate into dust. Williams says that those fiends were most likely deceased for a long time, as opposed to those who were recently deceased or simply possessed. After making their way through the sub-levels, Westlake comments how it seems too easy that they got this far in such a short time. As if on cue, they’re suddenly surrounded by a large group of Deadites and are forced to fight them off. Darkman and Ash manage to make quick work of them, as even Kelly gets a chance to use her taser. Afterwards, she tells Peyton that his clothes are on fire. Even though he’s not able to feel the intense heat, the flames from a Deadite’s blowtorch manage to spread throughout his coat. Fortunately, Williams manages to decapitate a Deadite and spray Westlake with its blood in order to extinguish the blaze. After being rightfully sickened by this recent action, Brynne ends up vomiting into Darkman’s hat. Peyton tells her that it’s OK since he has plenty of spare clothes back at his base, while Ash assures her that this kind of activity “gets easier” over time. However, they’re unable to rest for too long since another Deadite swarm approaches them.


Meanwhile, the Queen of Darkness and Deadite Durant contemplate about a glorious future under their demonic rule. Suddenly, his Deadite lieutenants Barry, Beau and Pauly come in and inform their rulers that they’ve captured out heroes. As such, the Queen and Robert approach a trio of Deadites with our main group unconscious and tied up. However, she senses that something is off as he magically unties Westlake and discovers that it’s a defeated Deadite, as well as the rest of them. Meanwhile, our actual heroes have discreetly taken their places in preparation for their ultimate end goal. From there, the Deadite-disguised Darkman causes a distraction with some smoke grenades before engaging the undead fiends, which includes Pauly and Beau. Williams also joins in on the action, while Kelly begins to read an exorcising incantation from the Necronomicon’s pages. Deadite Durant yells out his disappointment to his undead masses before he’s approached by Peyton and gets beaten up.


However, the Queen of Darkness manages to reach Brynne. Fortunately, Kelly uses the Book of the Dead to defend herself from the fiend’s demonic eye blast. From there, the group begins to chant the final part of the incantation as the unholy might starts to get removed from Julie’s body, causing the Deadite armada to fall apart and Robert to wind up dead for a third time. Thankfully, Hastings gets freed from her possession as Westlake manages to catch her. Because she’s no longer the Queen of Darkness, the whole temple starts to collapse as our heroes manage to get out in time.


Afterwards, a TV news reporter comments on how authorities are trying to piece together the events from the past 1 1/2 days, with their only rational understanding being that “hordes of dazed and confused people” wound up at the Bayside Construction Site. Meanwhile, Julie is getting taken into an ambulance for treatment as Brynne tells her that things will be OK before asking her on what she last recalls prior to her possession. Just as Hastings says that her last memory was her dinner date with Tony, her boyfriend comes in to comfort her. From there, Kelly heads out with an EMP worker who was secretly Darkman is disguise. Afterwards, they meet up with Ash up on the rooftops as he mentions about Julie enjoying her new boyfriend, to which Peyton says that she’s made a new life for herself and that’s all he wanted. Williams then compliments Brynne for her strong effort and says that they should go get some cheeseburgers and celebrate. Suddenly, he starts to fade away since the spell that brought him here is finally wearing off. After he states that they’ll take a rain check on that celebratory feast, they proceed to share a passionate kiss before he disappears back to his world. And so, the series ends with Westlake seeing Julie walking away with Tony as Kelly tells him how much life can suck sometimes. As he agrees, his narrates about him keeping Hastings alive at the expense of several other lives and that it’s something he’ll live with as Darkman.

Overall, Peyton’s place within comic books is something of a mixed bag. The comic adaptation mostly follows the original movie’s narrative, albeit with some differences sprinkled throughout. The brief inclusion of Louis Strack’s dad doesn’t drastically change things too much, since it only confirms that the father disapproves of his son’s investment with Gold Krugerrands and thus, the son schemed with Durant to bump off his dad in order to continue with said overseas buys. Altering how Darkman deals with Rick removes how Sam Raimi brought his unique style to the film, while Skip gets a late interrogation that Rick initially got before he’s presumably rubbed out off-panel. In the film, Skip simply vanishes by the time the climax rolls around. Presumably in a deleted scene, he would’ve been gunned down by his prosthetic leg, though it was ultimately left out due to technical problems. I also dug the adaptation showing Louis Strack, Jr. interacting with Julie a bit more than what the movie showed. After all, it delves into his swooning relationship with her and even foreshadows how he became financially secure. Not to mention, it gives him a bit more to do and fixes a problem where he’s absent for a long stretch between a benefit and her finding out about his devious construction plan. As for the exclusive ending that this comic has, it’s perplexing since it seems to confirms his own belief that he’s become a monster, which would’ve lined up with his speech to Julie. This is in stark contrast to the movie’s actual end where he runs off and disguises himself, since he doesn’t want her to share in his dread. He’s still shamefully shallow even though she was willing to be with him and thus, he finds himself in a similar situation like the 2016 version of Deadpool where he’s ashamed to be in a relationship with her while looking less than self-satisfactory. Either way, the artwork is actually pretty good for its time. It gets moody in a few select moments, while remaining in nice detail for the most part. The consistency with its coloring, inking and pacing helps make this a suitable way to introduce this concept to a younger audience, especially since the more excessively violent moments and foul-mouthed dialogue have been excised due to the Comic Code of its time. Despite that, it makes for a nice read for anyone who’s interested in the character. Moving on to the six-issue series, I admire how this gives lesser characters from the original movie some room to shine. Eddie Black getting some cyborg-esque gun hands gives some comic book credibility to this world, even if the guy is only limited to the first issue. Sure, he’s mainly a high-end lieutenant for Sanford Powell, but at least he’s given his chance to stand out on his own and becomes some form of street-level threat, albeit briefly. As for Powell, he’s a fascinating kind of foe because of who he is and of his power position. Because he’s a corrupt police commissioner nestled within a private club, he acts as a kingpin of sorts over his fellow men. As for how he gets out and gets his own hands dirty, he has past-life regressions to become a Witchfinder General named Matthew Hopkins in order to carry out his deranged idea of purification upon the city. This dual nature absolutely makes him a refreshing entry in Darkman’s rogues gallery, since he’s sometimes a commanding crime boss within sophisticate walls and sometimes an outdated hunter. It would have been interesting if he was the main adversary for the whole series, especially since Darkman has mainly faced either devious business men, drug lords or crime bosses. If our main hero gets some kind of continuation or a reboot, then it would be nice to see an ongoing venture with a fiend like him as the main adversary for the sake of variety. On the opposite end of him, Claude Bellasarious gets his own physical presence here as well after only getting mentioned by a key memo in the original film. With that, he has his own devious plan that also deals with construction of some kind, though it allows him to stay out of the public eye. Through him, it seems to give the first film’s Burn Doctor a name (Dr. Hermione West) and a bit more prominence with helping out in his scheme, albeit with some deviousness as a result. It’s something of a bizarre choice, since not much is done with her past this notion and she straight up disappears from this tale after Issue 4. Aside from her snide comment about Westlake being “a nine on the buzzard scale”, it unsure why Busiek and company decided to place her in this shady position, despite not doing much with it. Finally in terms of the series’ fiends, we have Claude and Hermione being responsible for creating their own endboss of the series in the form of a reborn (kind of) Durant. It was interesting that Robert was brought back here essentially with his original head and brain working in connection with a clone body. Two years before this crime boss officially came back from the brink in a bit more realistic way, this direction embraces a comic book-style that brings a nice style to this world. Not only that, but it helps makes him a physical threat to Darkman as opposed to the theatrical sequel that saw him as a mastermind leader in his own right. As for how our main hero was presented within these six parts, he has his good and bad moments. He starts out with his rough-edged superheroics that he developed over the course of his first film. As the series progresses, he becomes a reluctant savior to homeless people and even attempts to help Julie’s new boyfriend Donald make progress with his own relationship. While he does show some struggles and triumphs against his adversaries for this six-part tale, as well as some investigative work, he does have an emotional moment of weakness and ultimately causes more harm to his former girlfriend by disguising himself as Dr. Coe in his attempt to have another moment with her. To be fair towards that fault, he does waffle with that decision during the fourth issue (which is when this incident occurs) and when Julie gets kidnapped, he does blame himself for emotionally stressing her even further. There was even a cop in Brian Kelso who felt limited in his position due to having corrupt or inept leadership at his station, which leads to him taking action in the final issue. If he was made more essential to the plot, then he could’ve stood out a bit more. As is though, he’s fine. With all of that, the six issues are complimented really well with nice art work, good pacing and some neat narrative turns. Just like the comic adaptation, this Marvel entry is worth hunting down. Finally, we get to Peyton’s lone modern-day outing. Having Julie as an unintentional villain and eventually resurrecting Durant as her right-hand man feels simple, yet engaging enough for fans of both this and the Evil Dead franchise to follow, since the elements from both properties are married really well. Also, the heroes of both series have a few moments of disagreeing and emotional weight, yet they both work well together with their respective traits and skills. It evens uses a female character that was solely created for this story in a nice and respectable way as Brynne is smart, competent and very helpful throughout the tale. While she does find herself in peril a few times, she’s able to protect herself from harm and is able to do so without the helpful aid of our male protagonists. In that vein, our main trio works really well for this Deadite crisis as Kelly brings the caring brains, Westlake has the street-level leadership and Williams is the wiseguy sharpshooter with a chainsaw for a right hand. The tale is an easy read that flows at a steady pace and is accompanied by some truly effective art work, as nothing seems to be out of place. If you can find the four issues or even a trade paperback, then it’s worth checking out for a thrilling good time. In the end, it’s awesome that an originally-created superhero got to crossover into multiple forms of media. While it would have been nice to see what kind of world could’ve formed, what multitudes of foes he could’ve faced or even how Peyton ultimately cracks the synthetic skin code, it’s still a unique property to revisit every now and then. If you admire Sam Raimi-helmed projects, superhero media or even Universal’s classic monster flicks, then this is one synthetic mask worth putting on to experience.
Darkman (created by Sam Raimi) is owned by Universal Pictures.